
In one of my previous Blogs, there was a Business Scenario where on change of Business Process Flow Stage, we had to change the status accordingly.
Well, during the Business continuity, there are scenarios where a new BPF Stage and in turn a new Status can be introduced. So what to do in this case, shall we edit our Power Automate to cater to this new status or can we write something from the onset so that we do not have to make changes to our existing Power Automate.
Problem: We have earlier used Switch action to match our Status to the BPF Stage and had separate branches for the updation of the Status and given a new status we have to have a new branch developed, tested & then deployed.

Will you get surprised if I say that well there is a way to write your flow in such a way that you do not have to make any changes to your Power Automate and you still can introduce new statuses and Stages without getting stressed.
Assumption: Well the only assumption here is that you should have the same name to the Status & Stage, so that we can compare them!
Solution:Let’s create our flow, I’ll make changes to my original flow itself and explain the changed parts only. So if any old action you want in detail, please refer to my previous blog. My final flow is as follows:

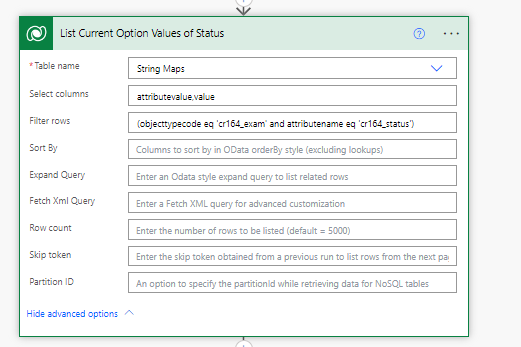
Step1: Firstly what I have done is listed down all the option set values from the desired option set. This you may find in the table “String Maps”. Thats interesting right!

You may filter rows by specifying your table and field name under Filter rows.
i.e objecttypecode eq ‘tablename’ and attributename eq ‘fieldname'[eq is equals]
This gives a lot of data but to limit my output to just the status name & code, i have applied the values under select columns.
Step 2:I am using the “Select” Data Operation to get the Status and code side-by-side. Here I have introduced two properties – Status & Code. You will refer the values from these property names only, so name it carefully!
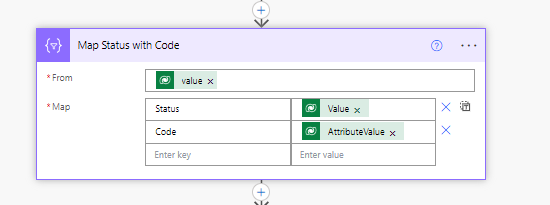
Tip: Use the Data Operation – Select action to transform the shape of objects in an array.
Step 3: I am using the “Filter Array” Data operation to match the Status obtained matched from the BPF Stage name. To access only the Status name part, write “item()[‘Status’]”
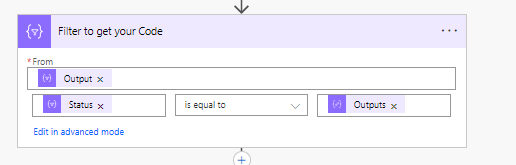
Tip: Use the Filter array – Data Operation action to reduce the number of objects in an array to a subset that matches the criteria you provide.
Please Note:
- You can’t use the filter array action to change the shape of objects in the array.
- The text on which you filter is case-sensitive.
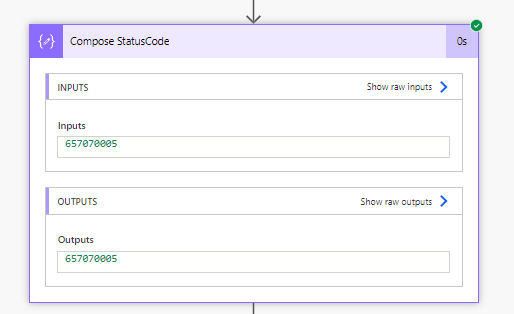
Step 4: Then I am using “Compose” Data Operation to get the code from the filtered array to update the Status. For this I am using the formulae body(‘Filter_to_get_your_Code’)[0][‘Code’]
It simply states to get the first element of the array specifically the code property
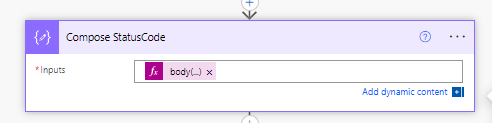
Tip: Use the Data Operation – Compose action to save your output to check the output in run history.
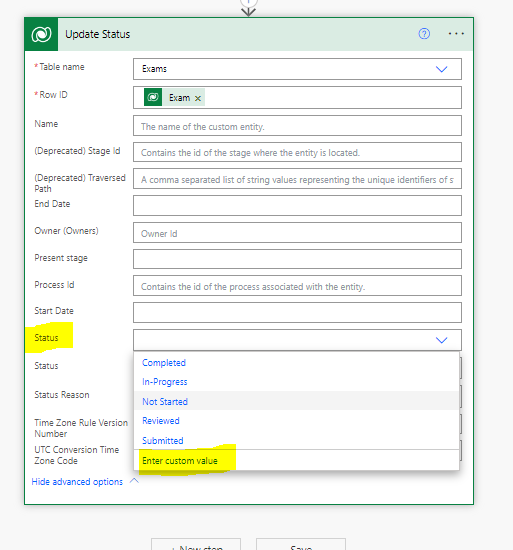
Step 5: Finally, i am updating the Exam Status record using custom value we obtained in the compose step.
Note: To update the option sets without using the predefined options, you have to do with with the code, thus choose the “Enter Custom value” and update it with the output of compose.
Application: Initially we had just 5 statuses and stages as below:

I have introduced a new Stage:

And the new Status with the same name:

Now lets see our flow in action!

Lets see all the Data Operations results:
Using the Select operation, we got the entire list of option set values along with the respective codes:

The Filter Array gave the result as below:

Finally from the Compose action , we got our desired value:
& the Status is changed:

Hope it helps!
& the Power Affirmation for the Day is:
“Put out so much positive energy that the Universe has no option but to return it”
